Document Composer
This guide walks through the complete workflow for creating a government decision document (beschikking) template in the Document Composer, binding it to process variables, and linking it to a BPMN process in the BPMN Modeler.
Opening the Composer
Click Document Composer in the left sidebar (📄 icon). If no document has been created yet, the canvas shows an empty state with a Create New Document button. Click it, or use the + button in the left panel header, to create your first document.
Creating a document
- Click + in the document list header. A new document named
New documentis created with all mandatory zones empty. - Double-click the document name to rename it (e.g.
Kapvergunning — Beschikking). - The canvas opens automatically with the six mandatory zones visible. The Annex zone is hidden by default.
Adding blocks to zones
The left panel has two tabs: Documents (the list) and Content (the block library). Switch to Content to access the draggable block types.
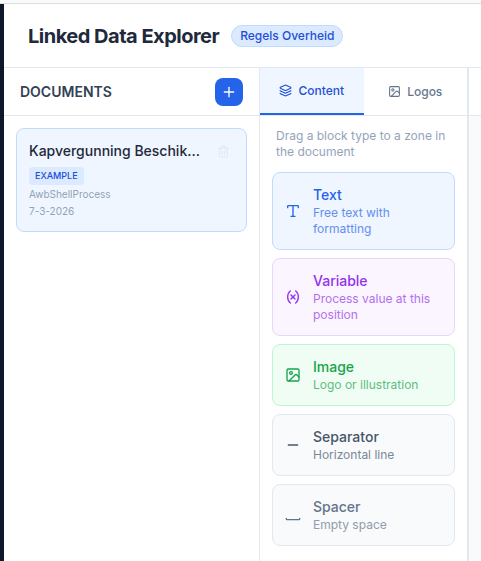
- Drag a Rich text block onto the Body zone. A TipTap editor appears inline.
- Type your decision text. Use the toolbar for bold, italic, headings, and lists.
- To reference a process variable, type
{{variableName}}directly in the text. The token is resolved at render time when MijnOmgeving fills in the document. - Drag a Variable block onto the Reference zone for a standalone display of a single variable (e.g. the file reference number).
- Drag an Image block to add a TriplyDB-hosted asset such as a municipality logo into the Letterhead zone.
Reordering and moving blocks
- Within a zone — drag a block up or down to reorder it within the same zone.
- Between zones — drag a block across zone boundaries to move it. The target zone highlights when the block is over it.
- Delete a block — click the trash icon on the block toolbar.
Enabling the Annex zone
At the bottom of the canvas, click Add annex. A seventh zone appears. Remove it with Remove annex. Blocks in the annex are not lost when the zone is toggled off and back on during the same session — but if you save while the annex is off, its blocks are not persisted.
Binding variables
Open the right panel by clicking the Bindings tab (visible when a document is active).
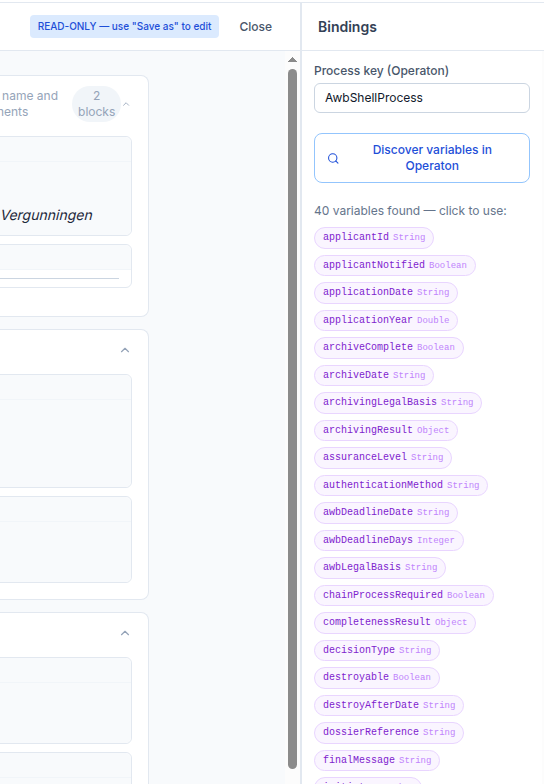
- Enter the process key in the field at the top (e.g.
AwbShellProcess). - Click Discover Variables. The panel queries the Operaton history API and shows a chip for every variable found in completed process instances.
- Click a chip to pre-fill the binding form. Adjust the placeholder field if the token name in your text differs from the variable key.
- Set Source to
processfor a live process variable, ordmn_outputfor a DMN result variable. - Click Add binding. The binding appears in the list.
You can also add bindings manually without using Discover Variables — fill in the placeholder and variable key fields directly.
Saving and exporting
- Save (canvas toolbar) — persists the document to
localStorage. The button is disabled when there are no unsaved changes. - Save as… — creates a copy of the current document with a new name. Useful for creating variant templates.
- Export .document — downloads the template as a JSON file. The exported file can be imported into another LDE instance by copying it to
public/examples/(developer workflow only).
Working with the example document
The Kapvergunning Beschikking example is read-only (EXAMPLE badge). It demonstrates a complete, production-style beschikking template linked to the AwbShellProcess process key. To customise it:
- Open the example document.
- Click Save as… and give the copy a name.
- Edit the copy freely.
The example document cannot be renamed or deleted.
Linking to a BPMN process
Once your document is saved, switch to the BPMN Modeler:
- Open or create a process.
- Click a
UserTaskelement to open its properties. - Scroll down to Link decision template. Your saved document appears in the dropdown.
- Select it. A purple badge (📄) appears below the
UserTaskon the canvas, andcamunda:documentRefis written to the BPMN XML.
The badge is distinct from the green form badge (📝) and the amber DMN badge so you can confirm all three links at a glance.
Next steps
- Document Composer features — full feature reference
- BPMN Modeler — Document template linking
- Developer docs — Document Composer — type model and storage internals